
Deploying a Node.js app is easy these days, with countless platforms like Heroku, DigitalOcean, Lightsail, the list goes on. But sometimes you might want or need more control over your server, and in that case an EC2 instance is a good choice.
There are a bunch of guides for manually deploying Node.js to an EC2 instance on the internet, but I haven't found many easy guides on setting up HTTPS for it at the same time.
Please note that this guide is meant more for hosting smaller hobby projects, and is most likely not suitable for production applications or larger scale projects.
What you'll need
- A Node.js app
- An AWS account with billing
- A domain name
- Basic knowledge of:
- using a terminal and SSH
- using Git from the command line
- Some money to spend on server costs
What you'll end up with
- An EC2 instance running your Node app under a custom domain
- HTTPS for your Node app using NGINX as a reverse proxy
Setting up the EC2 instance
An EC2 instance is a relatively cheap way of running your Node.js server, and it gives you a lot of control over it. This makes it a great option for all kinds of projects.
To get started, navigate to EC2 on the AWS console, and click Launch instance. This will open up the EC2 instance launch wizard. Give the instance a fancy name, and for the image choose either Ubuntu or AWS Linux, either will work. For this guide we'll be choosing Ubuntu.
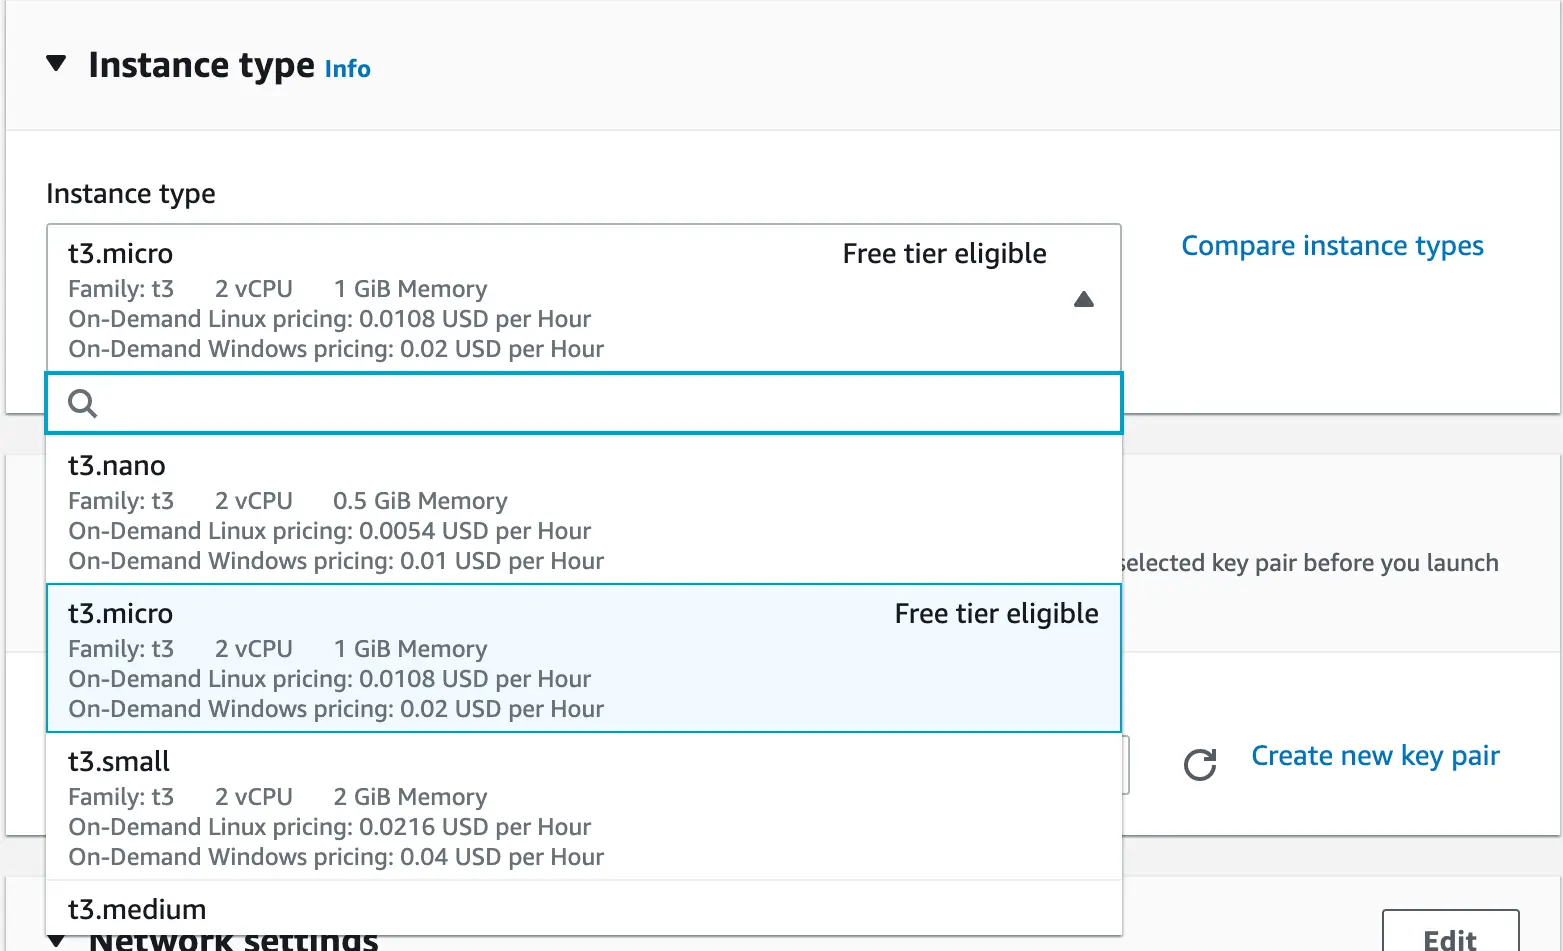
Instance type
Next up you need to choose the instance type. Your choice here doesn't affect the steps in this guide, only the performance of your server and the total of your monthly bill. You can go as low as around 3 € / month, and possibly even lower using spot instances, and completely free using AWS's free tier.
There's a lot of choices for this one and it can be difficult to choose the right one, but for a hobby project that's not too resource intensive, you can usually just choose a small and cheap one. Don't worry if you're not sure, you can change the instance type later. Here's a price comparison for the different instance types.
Remember to take note of the CPU architecture of the instance type you’re choosing, if your application or dependencies don’t support all architectures.
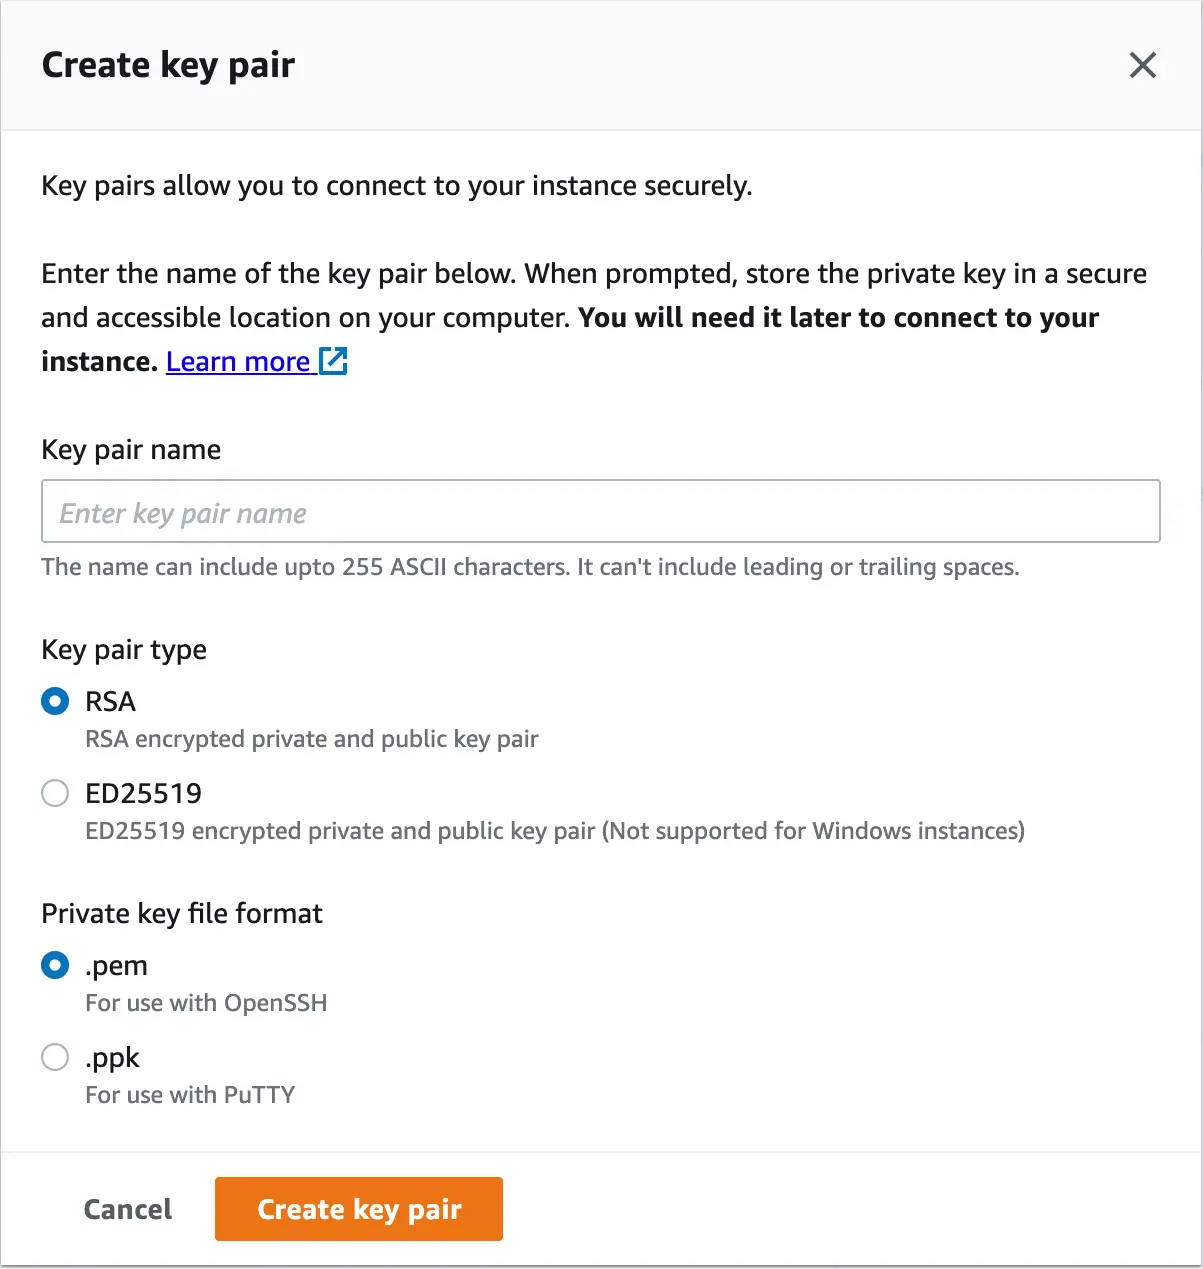
Key pair
If you want SSH access to the instance after it's been created, it is highly recommended to protect it using a key pair. You can click on Create new key pair to generate a key pair and download it to your computer. When connecting to the instance with SSH, you'll need to use the private key to authenticate, so keep it somewhere safe.
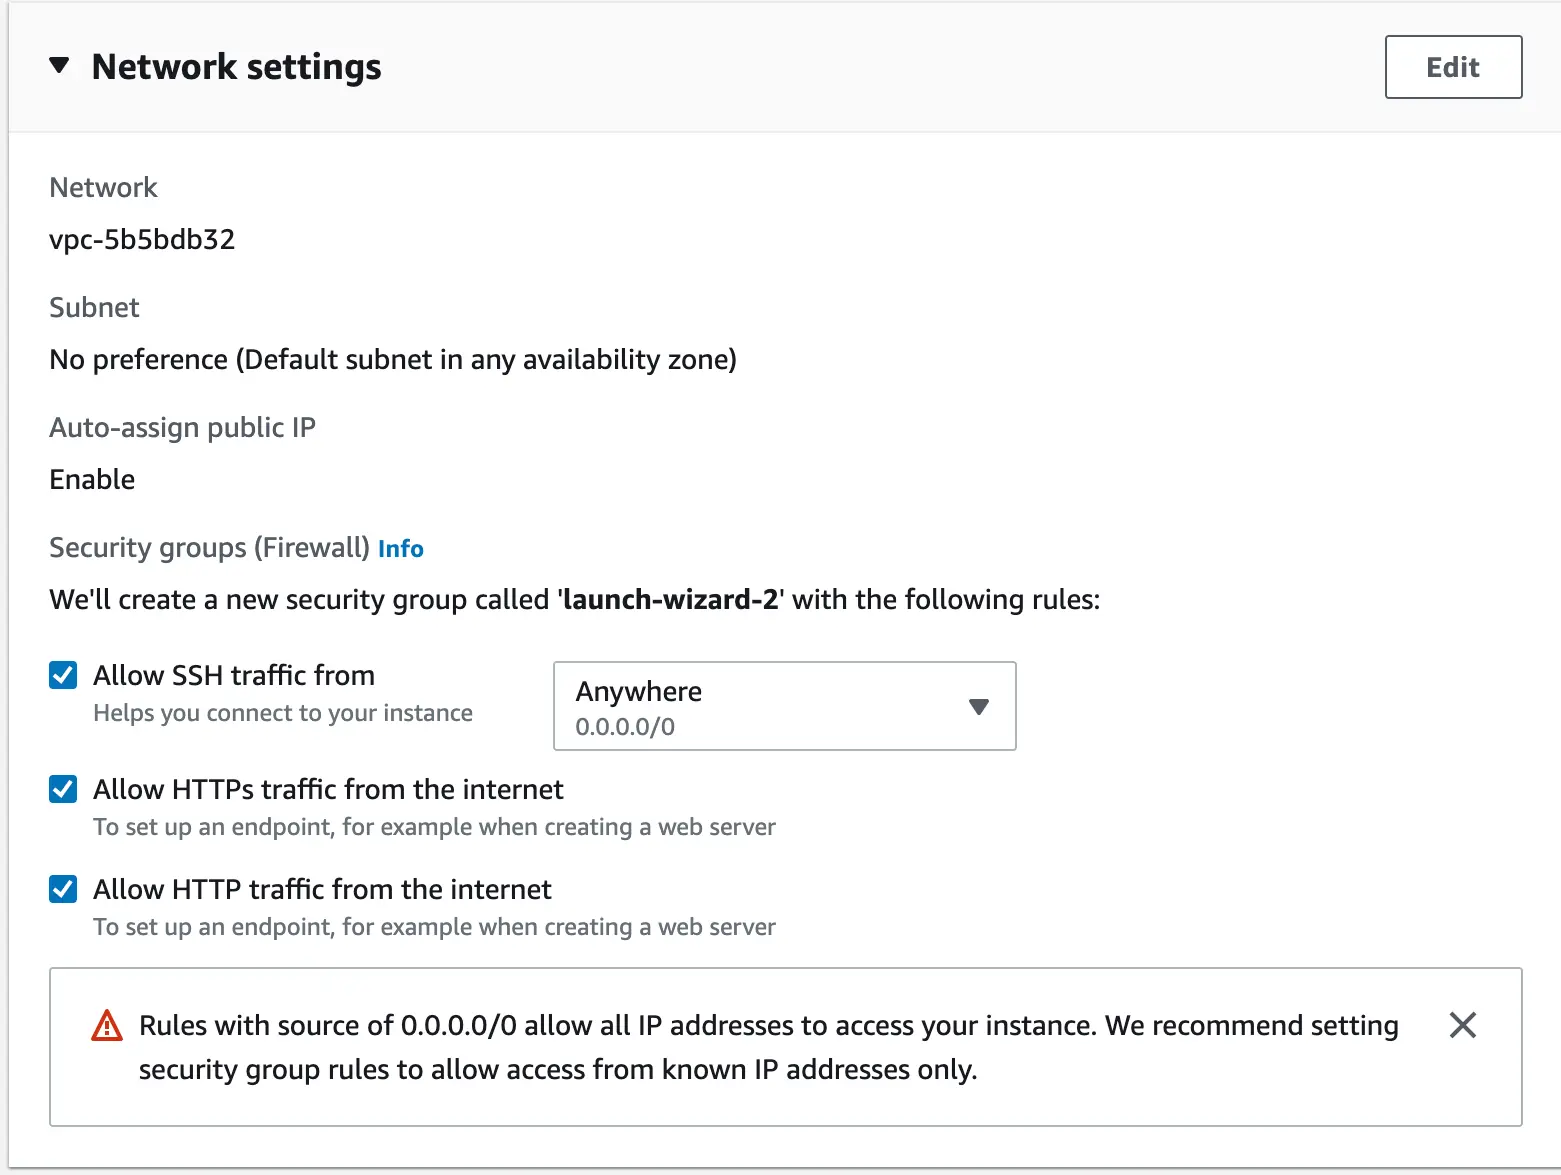
Network settings
To allow access to the instance from the outside world, we'll need to open up the instance to incoming traffic on certain ports. Make sure that Allow HTTPs traffic from the internet, Allow HTTP traffic from the internet, and Allow SSH traffic are all checked. It’s recommended to limit the SSH traffic to your own IP address only, unless you absolutely need to access it from somewhere else.
Now you're ready to launch the instance! Click Launch instance, and we're off!
Preparing the instance
After the instance is ready to go, we'll connect to it using SSH. Open up the instance in the AWS console and click Connect, and follow the AWS guide on how to connect. You can either use EC2 instance connect or SSH Client. I recommend using SSH, as it's a nicer experience in my opinion.
The instance doesn't come with any of the bells and whistles required for running the app, so we'll need to set up a few things before we have our Node.js server fully configured:
Node.js
You can either download Node.js manually from the internet, or you can use nvm. We'll be using nvm, as it makes updating the node version later on much easier. Follow the official guide on how to install and use it.
To setup node after installing nvm, run nvm install <version> (e.g. nvm install 16.14.2, or nvm install --lts to install the LTS version).
You can verify that Node.js is installed correctly by running node -v. It should print out a version number.
Cloning the repository and setting up your app
Ubuntu comes with Git pre-installed, but you'll need to install it separately if you chose Amazon Linux as your image.
Clone your repository to the instance using git clone <repository url>, and try running your Node.js app. Remember that in the setup phase we opened up only ports 80 (HTTP), 443 (HTTPS) and 22 (SSH), so you might not be able to access your Node app from outside the instance (yet, we'll get to that).
Follow the AWS guide on setting up your instance's security group if you want to open up other ports too.
NGINX
You could run your Node.js app without anything else, but in order to get HTTPS we'll be using NGINX as a reverse proxy in front of our Node.js app.
To install NGINX on ubuntu, run the following commands:
sudo apt update
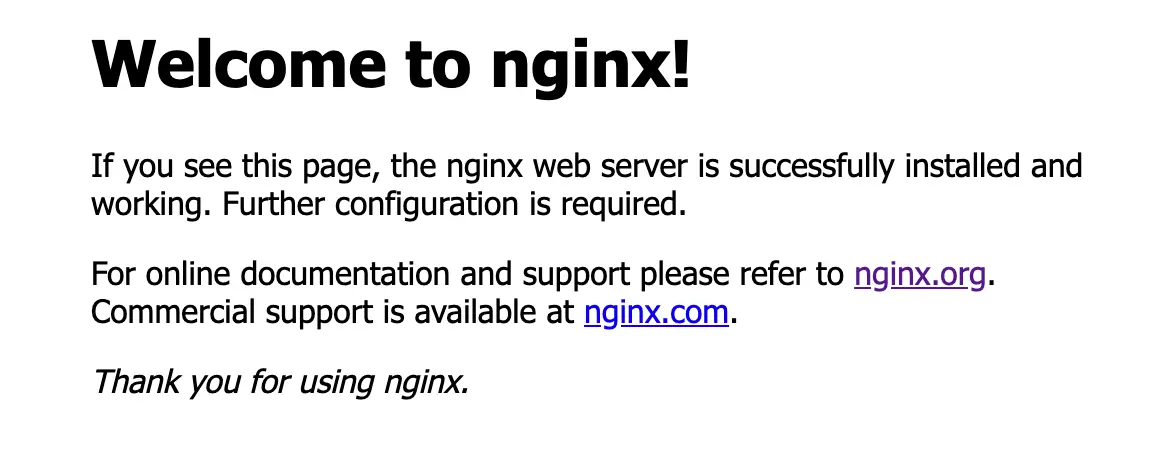
sudo apt install nginxNGINX should now be running on your instance. If everything went correctly, you should see the NGINX welcome screen when you type your instance's public IP address followed by the port 80 to your browser's address bar (e.g. 16.53.171.152:80).
Next, we'll need to set up the NGINX configuration to serve our Node.js app. The default configuration file for NGINX is located at /etc/nginx/sites-available/ in a file called default. To edit the file in a terminal text editor, run the following command: sudo nano /etc/nginx/sites-available/default.
We'll edit the default server configuration to listen to port 80, and forward all incoming requests to our Node.js server using proxy_pass. Make sure that your Node.js app is NOT running on ports 80 or 443, a safe port is something higher, like 3000 or 8080.
Edit the default config's server block to look like this, removing any unrelated bits.
# ... rest of the file

server {
  # listen for incoming traffic on port 80
  listen 80;

  # server_name should be equal to the domain that you'll point to your Node.js app,
  # but if you haven't set up that yet, use localhost for now.
  server_name localhost;

  # for all incoming requests, do the following:
  location / {
    # this forwards the request to our Node.js app (assuming it's running on port 3000).
    proxy_pass http://localhost:3000;
  }
}
Now exit the editor by pressing ctrl + x, typing y to save the changes and pressing enter to save to the file called default.
We'll need to reload NGINX so that our changes are applied, do that using the command sudo nginx -s reload.
If everything is set up correctly, when you navigate to your instance's IP address (with port 80 again) in the browser, you should be greeted by your Node.js app instead of the NGINX welcome screen.
Domain setup
Using the IP address to connect to the instance isn't very nice, so next we'll setup a domain to point to our instance. A domain is also required to set up HTTPS on our server.
There are a couple of ways to point a domain to the instance. You should refer to your domain provider's guides on how to set this up, but here's the gist of it: You need to create an A record that points to the instance's IP address. The IP address of your EC2 instance can change upon restart, which would break your DNS configuration. To avoid this, you'll need to associate an Elastic IP to your EC2 instance.
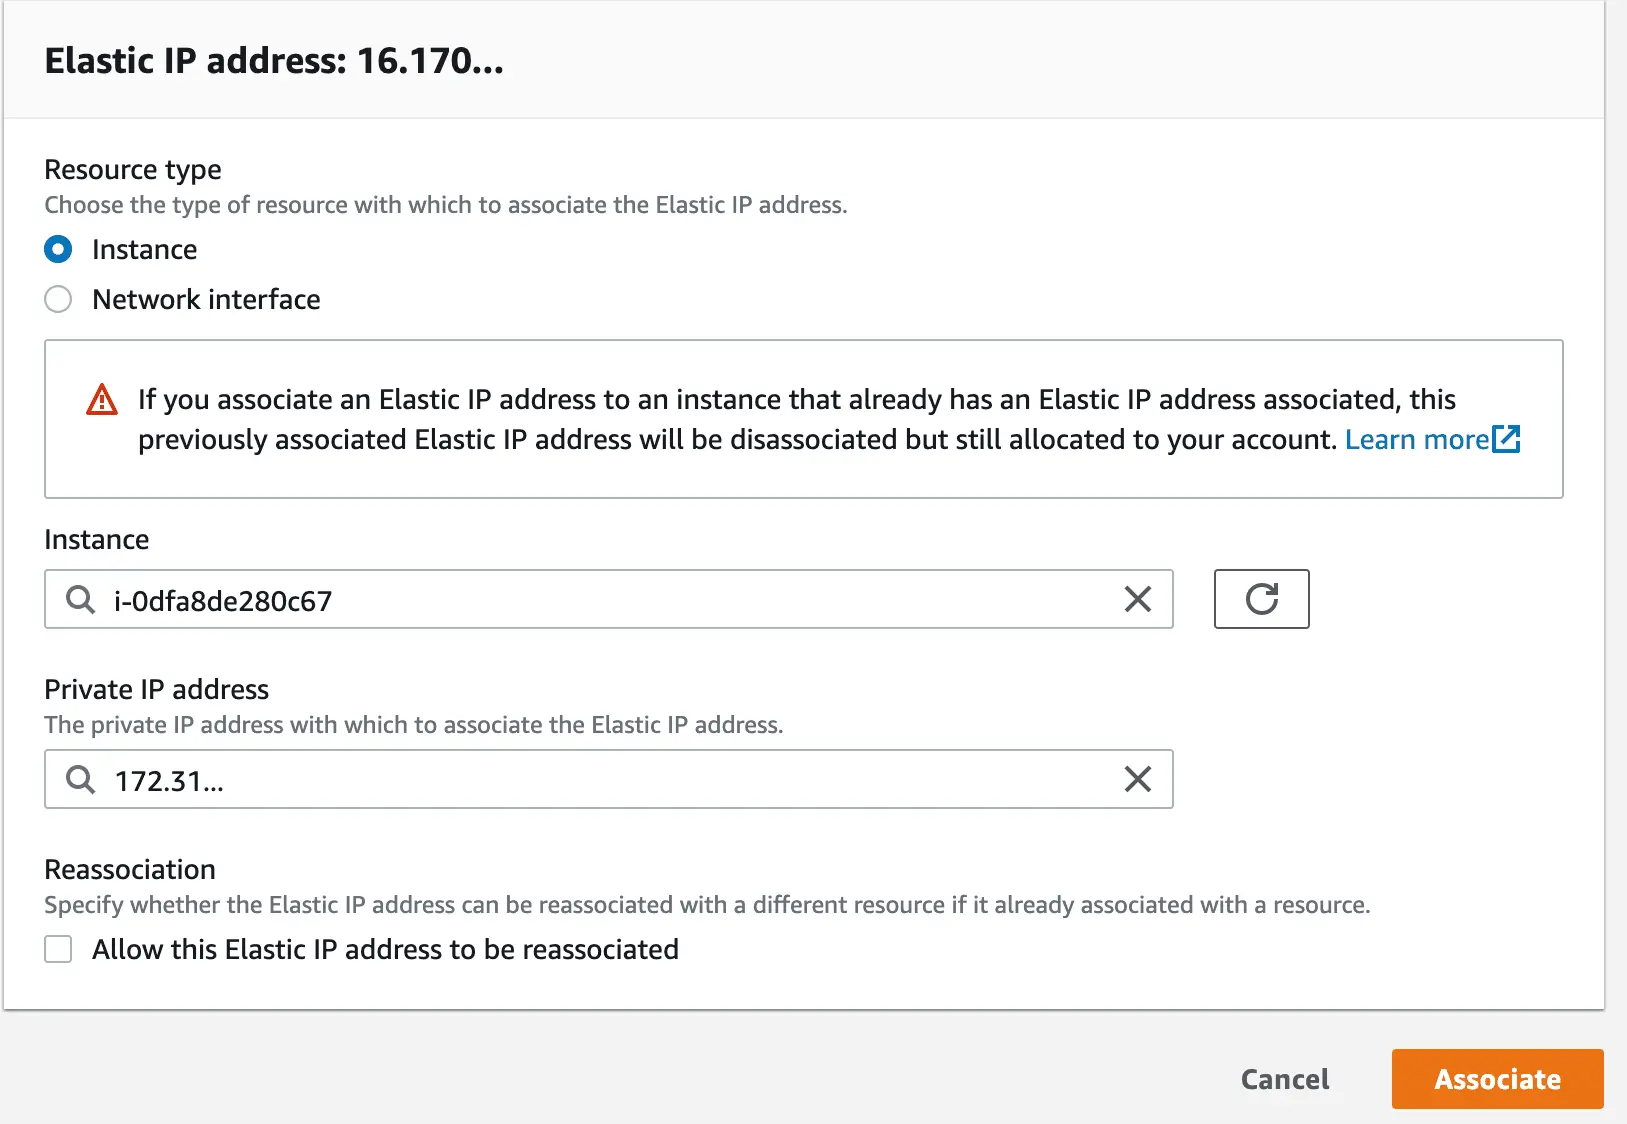
In your EC2 console, go to the Elastic IPs tab, and from there click on Allocate Elastic IP address.
After you've allocated an elastic IP, click on 'Associate IP address', select your instance from the menu and select an IP. After that your instance should have a permanent IP address, and you can point your DNS record to it.
IMPORTANT: Once your DNS is set up so that you can access your instance by navigating to http://<your-domain>, remember to update the server_name field in your NGINX config to match the domain (e.g. server_name example.com;). This is important, as the server_name will be used in the next step to generate the SSL certificate.
HTTPS
We'll use Let's Encrypt to generate an SSL certificate to use with NGINX. There are a couple of ways to do this, but one of the easiest ways to do this is to use Certbot, which we'll set up next.
Here's the guide on setting up Certbot for Ubuntu and NGINX. Following that guide, Certbot will configure NGINX for us, and automatically renew our SSL certificate so that we don't need to do anything else. After running Certbot successfully, you should be able to access your server in the browser using https: https://<your-domain>
Aaaand... we're up!
If everything went to plan, you should now be the proud owner of a Node.js app running on a custom domain with HTTPS enabled. What will you do with all this power, I wonder...
Extra spice
PM2 / Docker
It is recommended that instead of running your Node.js app using the good old node index.js, you use a process manager like PM2 or put your app into a Docker container. This way you can more easily configure your Node app to restart automatically if it crashes, and start up when the system starts.
You shouldn’t need to change your NGINX configurations when running your app using PM2 or Docker.
Auto updating
So far the server won't auto-update when you push changes to Git. You can set up auto-updating many ways, like by creating a GitHub Action or Webhook and using an NPM package like @kvanttori/huukki (created for this kind of use-case) to auto-update your Node app. Here's a guide on how to set up auto-updating using GitHub Actions, for example.
